

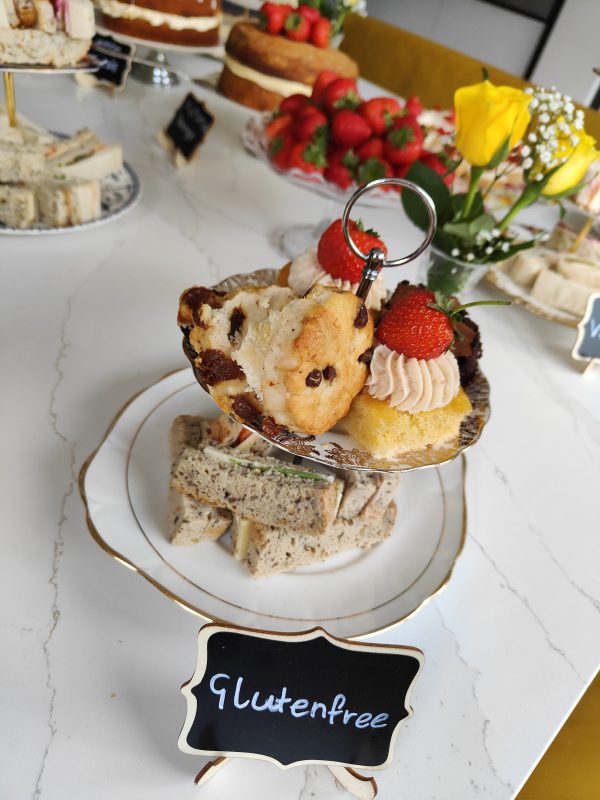
Gluten free afternoon tea
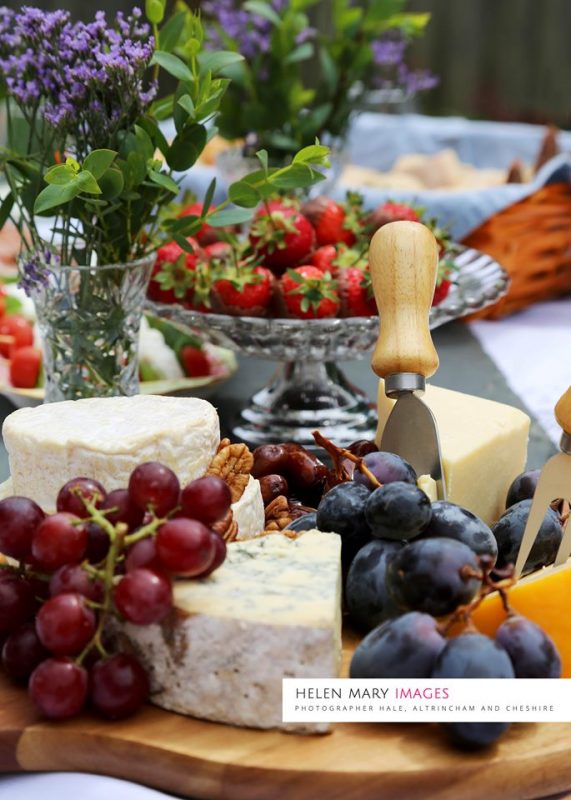
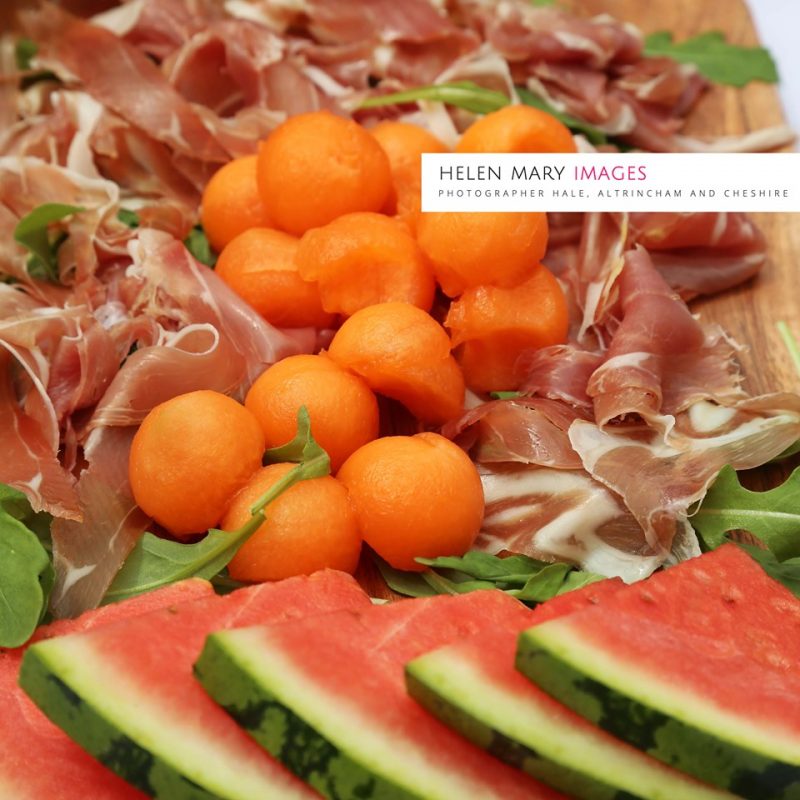
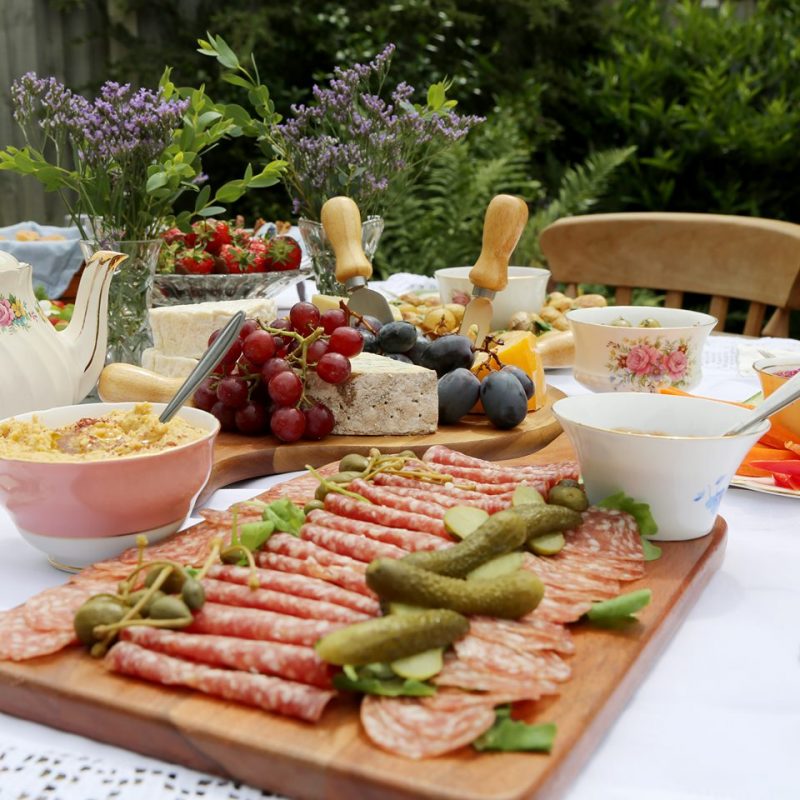
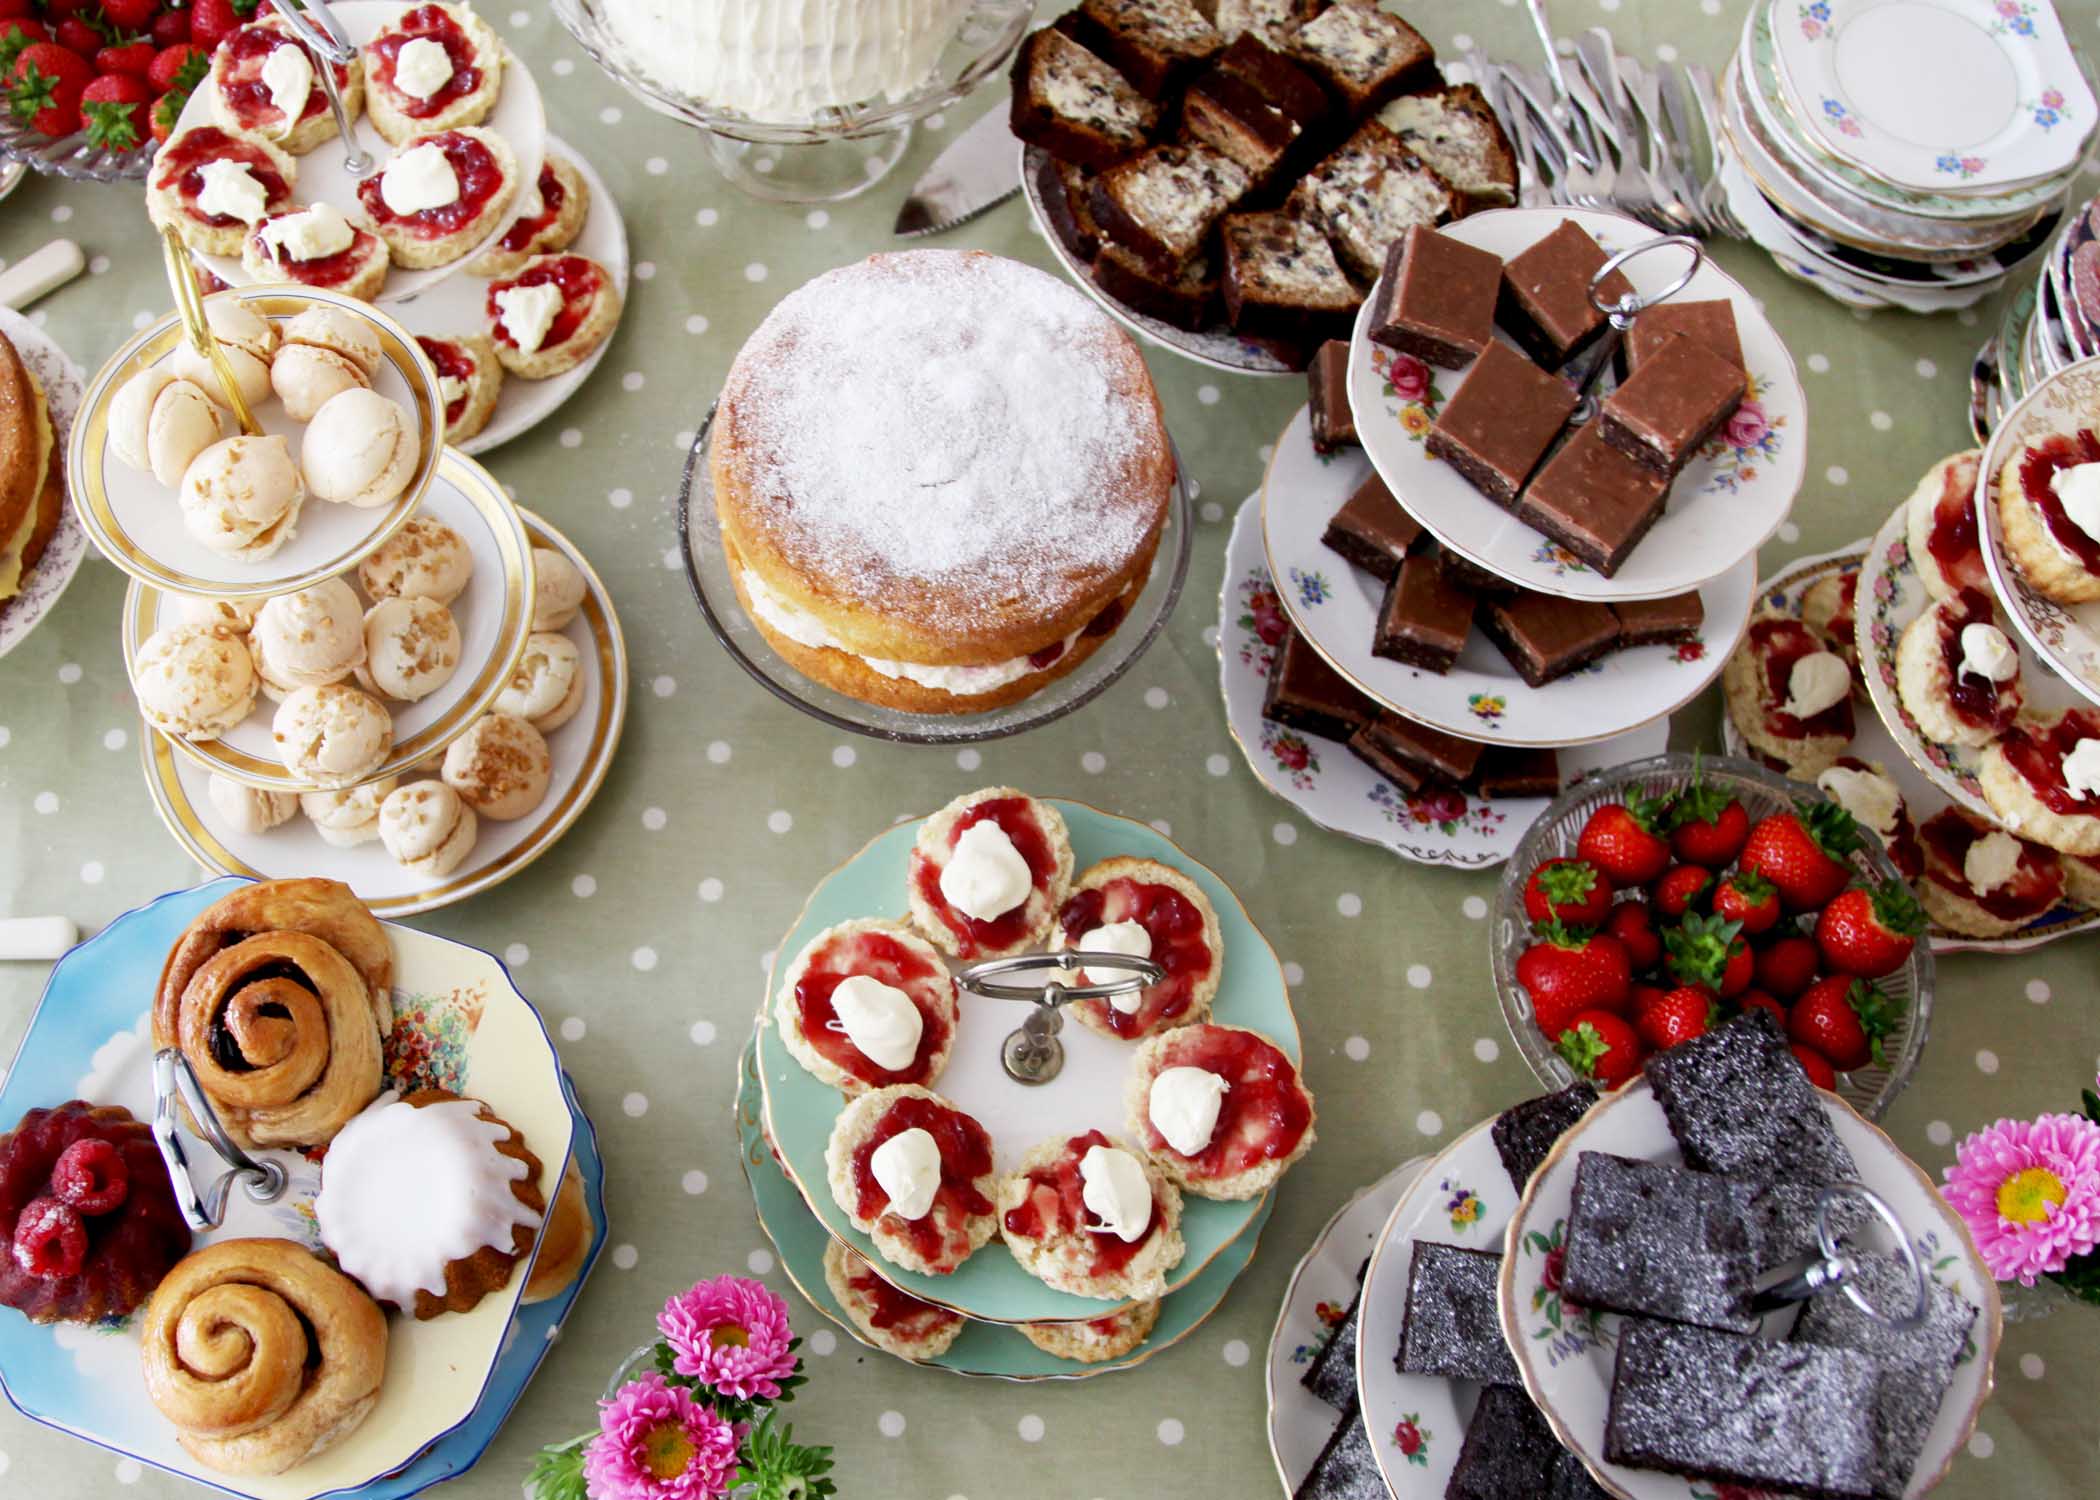
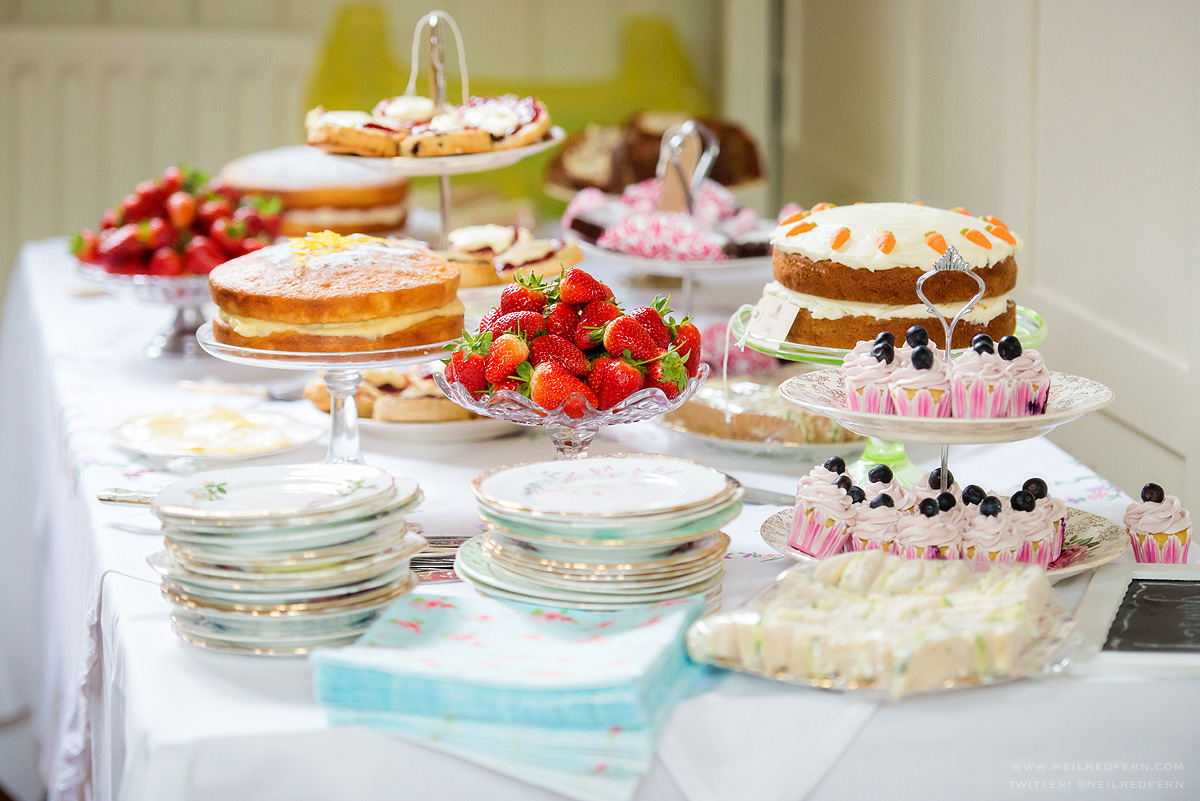
So excited to introduce to all our clients our new menu option…grazing platters, the latest trend in event catering, and one of the best yet in our opinion! Our creations provide a wonderful decorative feast and the perfect centrepiece for any event. Delicious charcuterie boards, decorated with fresh herbs and berries. A selection of cheese and crackers with fresh fruit and chutney. Homemade humous, baba-ganoush and roasted red pepper sauce, served with crudité and a selection of delicious breads. Bowls of olives. Falafel. Antipasti skewers with vine ripened cherry tomatoes and buffalo mozzarella. All presented beautifully on our wooden boards, slates, and fabulous vintage china.
Our team will arrive to your venue in plenty of time to set-up your grazing platters and create a beautiful display that your guests will be wowed by. We can leave you to your feast, or stay to help with drinks and clear up. And if you fancy a sweet treat to accompany your savoury grazing platters we can provide that too.
Corporate events are always an absolute pleasure to cater for. We’ve been to many offices and venues across Manchester and Cheshire providing delicious food that has the ‘WOW’ effect. Yesterday we were lucky enough to be at the head office of PrettyLittleThing.com They booked us to provide afternoon tea for 200 employees to celebrate the royal wedding. We took over the cafeteria with all our gorgeous vintage china and more cake and scones than even I have ever seen. Our tea-lady team spent the afternoon filling cake stands with all our home baked goodies and pouring tea in to our pretty teacups. We knew it was going well when the first guests walked in to the room and squealed with delight! We had numerous guests popping in to the kitchen to say thank-you to us and to compliment us on our cake….we even had one chap ask who the baker was and then came over for a hug! Total success. Here’s a little clip from the afternoon…
If you are interested in booking us to come and cater for your corporate event just get in touch. We can work in pretty much any space you have available, anywhere across Manchester, Cheshire and the surrounding areas, and to any dietary or other requirements you might have. We serve delicious home baked food that is about as far from the beige buffet as you can imagine. Our customer service is 5* and that is reflected in our reviews (check out our Facebook page www.facebook.com/alicesvintagepantry). Look forward to seeing you soon!
Planning a wedding or celebration? What a way to provide pudding for your guests!! We home bake lots of delicious cakes, puds and sweet treats, deliver them to your venue, display them on gorgeous vintage cake stands, add some accessories and decorations, provide tea-plates and cake forks for your guests to use, and then come back to do all the washing and clearing up.

An amazing centre piece for your room, and a great way to offer your guests lots of choice. You can even add on a tea and coffee station for your guests to get hot drinks…and tea-ladies to serve and keep everywhere tidy We love it!
Get in touch to book yours: tea@alicesvintagepantry.co.uk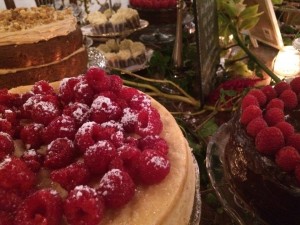
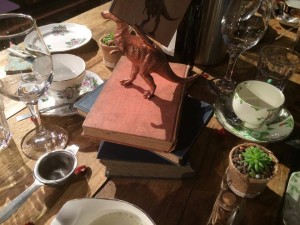
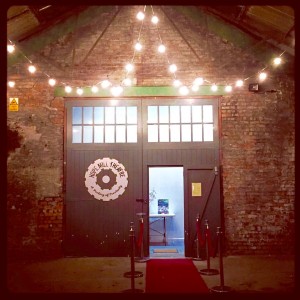 Thought this fabulous wedding was worth a little write up. Dinosaurs and afternoon tea…what a combo!! We love it. This gorgeous venue is one of our all time favourites, Hope Mill Theatre in Manchester. It’s situated in the ground floor of a former cotton mill, now a grade 2 listed building. The space is SO unique. Super high ceilings, two large spaces that both feel cosy, fab staff, flexibility to create the wedding you want in the space, AND they are not a wedding factory.
We were beyond delighted to be selected to provide a vintage afternoon tea for the wedding of our clients Lauren and Chris. Booked 12 months before their wedding we were counting down the days. It was a complete honour to be catering for them in Hope Mill. 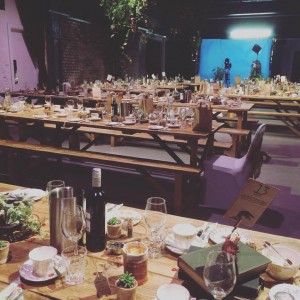
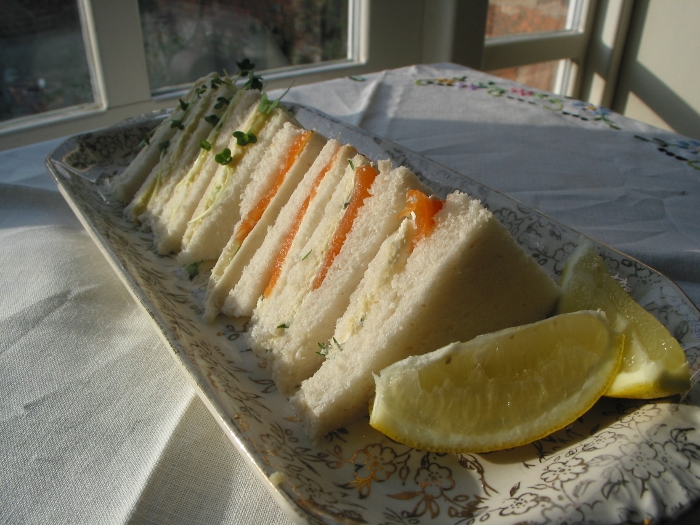
With 130 guests at the wedding we had a lot to do. We baked lots and lots of cake, 150 scones, and made over 1300 yummy sarnies. The guest list included 16 vegetarians, two vegans and 17 children. The menu catered for them all. We had eight different sandwich fillings on the menu, and 14 different types of cake.
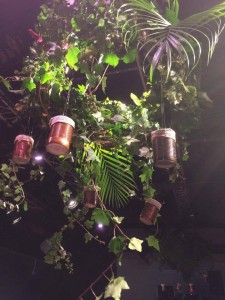
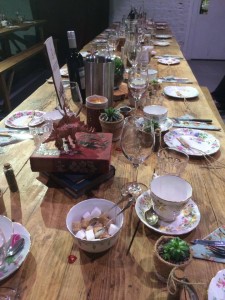
The room was set-up with the most gorgeous solid wood trestle tables (on hire from www.rustictrestletablehire.com), vintage books and dinosaurs on the tables, and the most beautiful floristry from Eden Floral Styling (our vintage china to complete the look). Set-up and smooth running of the day managed by the fabulous Stef from Alternative Weddings Manchester.
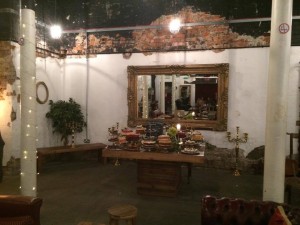
 Run up to the big day was busy, the day itself beginning with room set-up. The empty space soon filled and looking great. Then back to our base to make all those sandwiches. We were using a mix of rolls, thinly cut wraps, seeded, wholemeal and white bread. All the sandwiches and scones were served to guests at the tables, along with lots of hot loose leaf tea. The cakes were presented on a beautiful table for guests to help themselves. This was a great option for our clients, they were keen to keep the wedding informal with lots of opportunity for guests to mingle. It also meant guests had lots of choice of what they ate!
Cakes included our best sellers Lemon Drizzle (with a fresh lemon curd filling), Carrot Cake and Nan’s Chocolate Fudge Biscuit, one of my Nan’s recipes. It wasn’t long before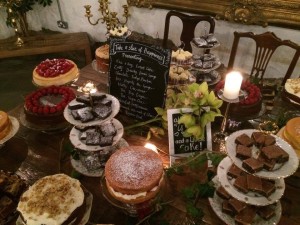 guests were filling their plates. Our tea-lady team were on hand to keep the cake table tidy and topped up, teapots full and everyone happy. Once food, tea and speeches were finished our team cleared the tables and helped prepare the space for the evening of entertainment. We all had a fab time, tea-ladies and guests alike. So much LOVE in that room!!
If you want to know a bit more about the day, or about what we could do for you, just get in touch…tea@alicesvintagepantry.co.uk
A few more images from the day…
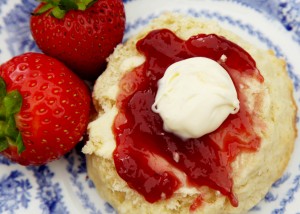
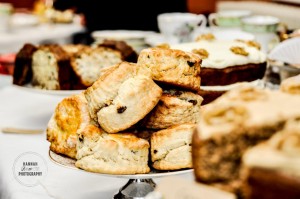
Scones come in all shapes and sizes, a wealth of recipes are available from savoury to sweet, fruit or cherry filled, milk, buttermilk or cream. Then there is the shape – drop scones, triangle, square or the more commonly used round scone. Topped with butter, jam, fresh cream or cream everyone has their favourite scone.
At Alice’s Vintage Pantry we have tried lots of different recipes and make different scones for different occasions. No matter what your favourite type is or what recipe you are using, if you are baking your own follow our scone tips to get your perfect scone.
Try these tips with Delia Smith’s basic scone recipe…
225g self-raising flour
40g butter, at room temperature
1½ tablespoons caster sugar
a pinch of salt
150ml milk
Preheat the oven to gas mark 7 (220c). Grease a baking sheet.
Sift the flour into a large bowl and rub the butter in rapidly using your fingertips. Stir in the sugar and salt, take a knife to mix in the milk little by little. Knead the mixture to a soft dough.
Turn the dough out on to a pastry board and roll it out using a floured rolling pin. Cut the scones out using a 4-5 cm cutter and place on the baking sheet. Dust each one with a little flour. Bake near the top of the oven for 12 minutes or until golden brown.
Enjoy with good quality jam and clotted cream.
Really delighted that one of the weddings we catered for last summer has been featured on the fabulous Rock My Wedding website today! Massive congratulations to Rebecca and Rob for organising such a fantastic and unique wedding…all held on their friends farm in Smallwood, Cheshire. Stunning photography by Steve Bridgewood Photography! Click here to see more…http://www.rockmywedding.co.uk/rebecca-robert/

Afternoon tea anyone? Fresh baked scones, plenty of hot tea, finger sandwiches and delicious cakes. Who doesn’t like it? Given the recent rise in popularity of afternoon teas I think the answer is not many! It seems to go down well with all ages, and works for almost any occasion….from weddings, to baby showers, birthday parties and christenings. I’m lucky enough to spend lots of time at vintage tea parties. With enquiries flooding in at the moment I thought it might be a good time to share a few tips on how to go about creating a vintage tea party.
Hope these tips help get your tea party planning started! Get in touch to find out more about how we can help you.
Blog original written for the Manchester based online magazine ‘4 Manchester Women’
Parkin…feels like I haven’t made this for a while…it’s been 12 whole months since it popped out of my recipe books and made an appearance in my well used ovens. Each year I make several batches to give to friends and family and to take along to Bonfire night parties, and each year I wonder why I don’t get it out more often. As I sit and write this, the smell of Parkin wafts through the house as it rises in the oven. Will I be able to resist trying a little later on tonight? As Parkin vastly improves in taste and texture if you leave it for a few days, I tell myself I will wrap is tightly in foil and leave it well alone until the weekend….if this happens it will be a first, no cake in this house lasts longer than 24 hours…we love our cake and we certainly eat it…one of the major advantages of baking for a living.
So what exactly is Parkin? Well there is lots of history to it which I won’t detail here, basically it comes from up North (yippee) and is kind of a cakey version of gingerbread, often baked with oatmeal and treacle. Records of it trace back a good few centuries and no-one seems to know exactly why it has been associated with November 5th (not too concerned about that, just want it to taste good). Recipes vary massively, we normally bake one that contains treacle and oatmeal, but decided to give this a go this year….
Auntie Eva’s Parkin Recipe
Good old Auntie Eva brings us this one from her home in Bradford at the age of 93! Still sharp as her name (Eva Sharp) she will be delighted to know that her favourite Parkin recipe is being shared with others.
2 breakfast cups of self-raising flour
1 breakfast cup of sugar
1 teaspoon baking powder
1 teaspoon bicarbonate powder
1 teaspoon ground ginger
4oz stork margarine (she is very particular about that!)
1 small table spoon golden syrup
1 cup boiled milk
1 egg
Really simple to make, just mix the dry ingredient’s, rub in the margarine and pour over the milk and syrup – stir well and bake in a 20cm square tin. Bake for 1 hour at 100 degrees, then turn the oven up by 10 degrees and bake for another half an hour.
If you want to add the oatmeal, just reduce the amount of self-raising flour and replace it with the equivalent amount of oatmeal , either double the amount of golden syrup or add a tablespoon of treacle.
Bakers tip: to help you spoon in the syrup and treacle, place your metal spoon in a mug of boiling water before using it – the syrup will just slide of the spoon into your mixing bowl.
Wrap your parkin in foil and leave it for a few days before eating.
Happy baking!
From picnics to sports day – how to bake the perfect sponge cake

Winning the Mum’s race at sports day just isn’t that cool is it…nor was coming last as I remember from my last encounter with such an event (oh my goodness, how on earth did I manage that?!). What is cool is donating a beautifully light and perfectly risen Victoria Sandwich to the refreshments stall. Rising above the tray bakes and cupcakes the perfect sponge will make you proud that you tied your apron strings rather than the laces on your trainers. Whilst others are in their lycra sweating (yes, some Mums actually do put themselves and their kids in training for sports day!), you can be in the kitchen sipping tea whilst you mix your buttercream. And baking your own is at least a zillion times better than shop bought sponge. Not only does it taste far better, it’s cheaper, you know what’s in it and it’s a creation you can be proud of. This is all sounding a bit like a Kirsty Allsop dream…the reality is that many of us don’t have much success in getting our sponge to rise…flat cake syndrome is all too common and puts many off baking their own sponge cakes…so what to do about it? Well, there are some basic rules to baking that whilst pretty straight forward really do make all the difference to turning out a cracking cake. Have a read below, give it a go and let us know how you get on….
")
Victoria Sandwich recipes seem to be everywhere I look – with jubilee celebrations and the picnic season well and truly upon us, every supermarket shelf and magazine is offering us their variation on the classic sponge recipe. At Alice’s Vintage Pantry we use a tried and tested recipe that turns out the most delicious Victoria Sandwich…needless to say I’m quite keen to keep that one close to my chest, so here is another created by the super talented and much loved Delia Smith.
Preheat the oven to gas mark 3 / 170c. Grease and line two 18cm cake tins.
Cream butter and sugar together. In a separate bowl beat the eggs together thoroughly then slowly add to the butter and sugar. Stir in the vanilla essence. Sift the flour on to the mixture and slowly incorporate using a metal spoon. Divide the mixture equally between the two tins and bake for 25 minutes or until well risen and springy to the touch.
And if you don’t want to put your apron on don’t forget we can bake one for you – we deliver anywhere in Manchester, Cheshire and the surrounding areas.
This blog was originally posted on the 4Manchester Women website www.4manchesterwomen.co.uk


